You are here: Home → Lighting A Scene
Lighting a Scene
Lighting is one of the most time-consuming processes in the pipeline but also one of the most gratifying. Images that come out of lighting are almost final (except for some minor color correction) and should be ready to be put into the movie. Once you're done lighting, you should be almost done with your movie!
This lab focuses on how to set up your lights so assets in the scene look interesting. For more information about the different Maya lights and their properties, check out the lighting tutorial.
Why is Lighting Important?
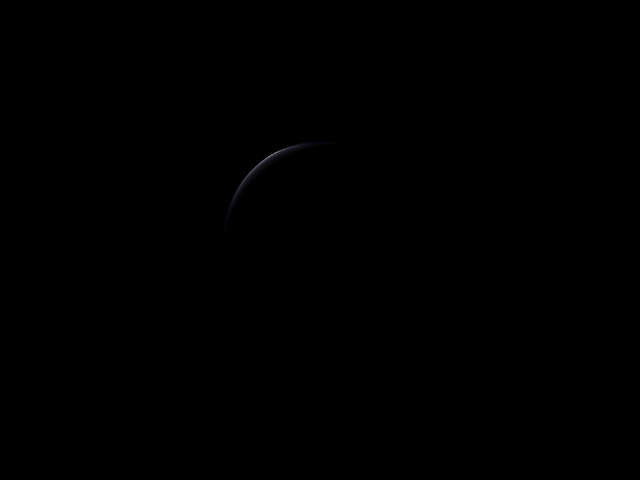
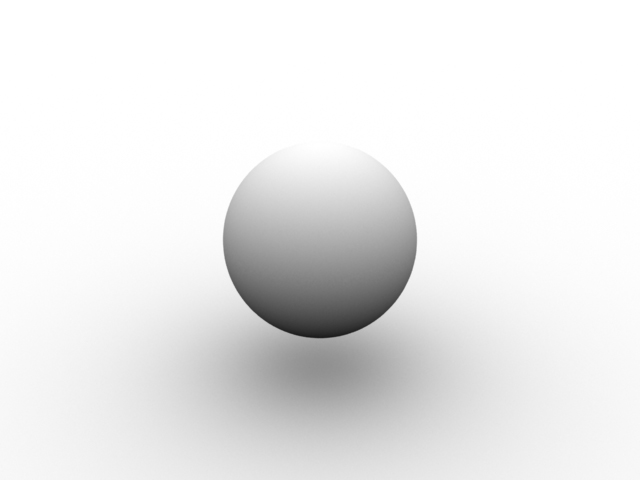
Lighting gives the viewer clues as to the shape and position of objects in your scene. Imagine a sphere being lit uniformly from all angles. Since light can illuminate all points on the sphere, there is no shadowing and the sphere turns into a disc. Boring.

Without changing the shaders at all (for the record, it's just a blue Blinn. Nothing fancy) I can make this into a much more interesting image just by lighting it correctly.
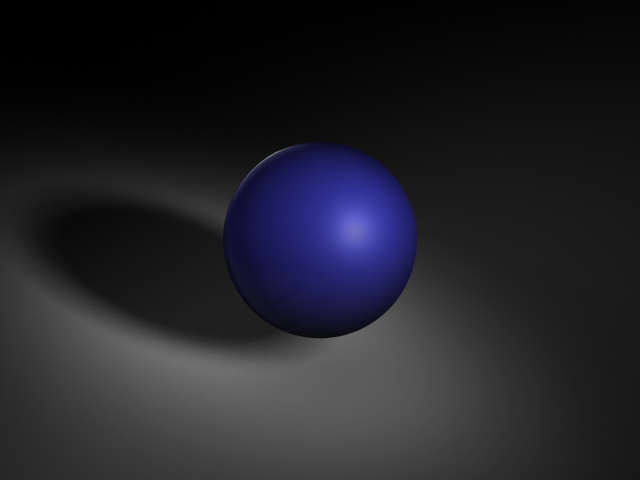
This scene uses a lighting scheme known as "Three Point Lighting". This is almost always a good starting point to which you can add more lights to fill in the dark spots.
Three Point Lighting
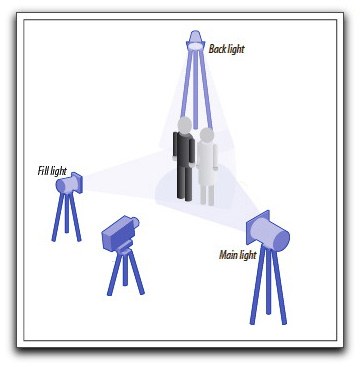
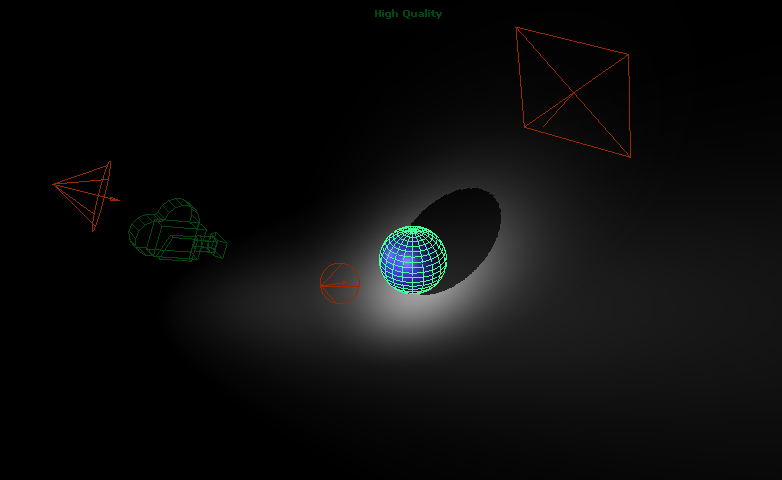
As the name implies, three point lighting uses three lights. The main light, called the "key" light, is the strongest light and is positioned above and in front of the subject off to the side of the camera. The key light usually represents the biggest light source in the scene (eg. the sun or a stage light) and is therefore has the highest intensity. Often, this is the only light that needs to cast shadows. Using the example above, here is the key light's contribution to the final image:
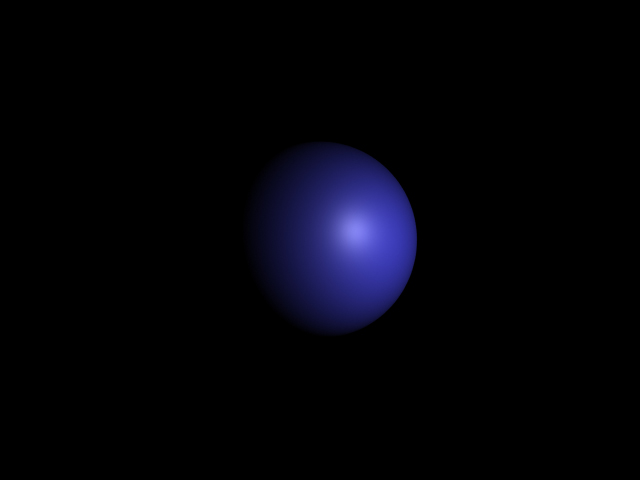
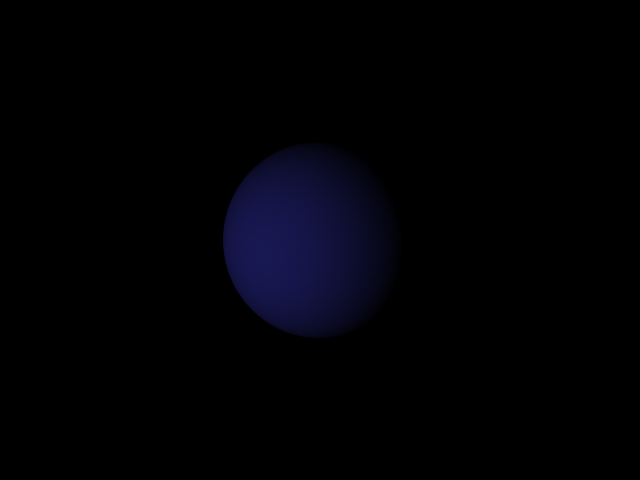
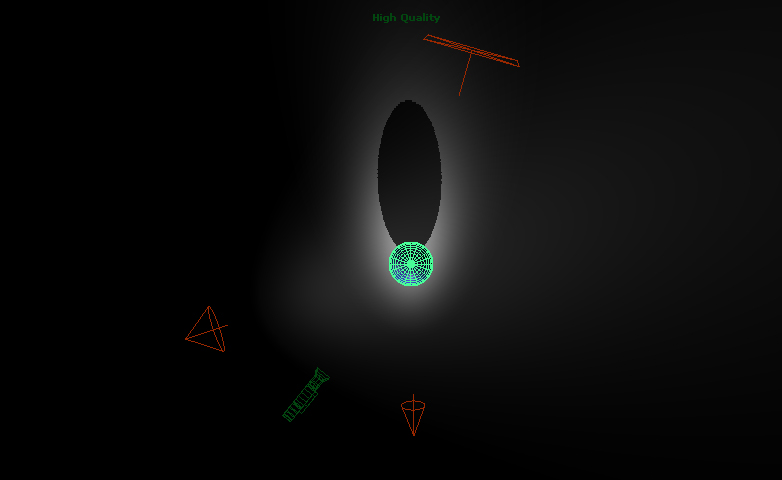
The second light is called the "fill" light. This light fills in areas that are shadowed from the key light. It is usually placed in front of the subject, below the key light and on the opposite side of the camera. Below is the fill light's contribution in the sphere example:
The third light is the back light. This light is often combined (sometimes unintentionally) with something called a "rim" light. As the name suggests, it lights the subject from behind, usually on the opposite side as the key light. If you use a back light as a rim light, one of its main purposes is to provide a rim that makes the subject stand out from objects behind it. This is especially noticeable on hair, grass, and objects that have similar color/brightness as the scene behind it.
And there you have it! The whole scene only had three lights in it. I've included screenshots from Maya that show the position of my lights relative to the camera and objects in the scene.
Shadows
Shadows are a finicky subject in computer graphics. Depending on which method you use to render them, they can take very little time or they can take ages. It is a good idea to cut down the number of shadows you need, both to keep the image simple and to shorten render times.
Often you only need your main light to cast shadows but it depends a lot on your scene. On a bright sunny day objects usually only have one shadow from the sun as opposed to at sporting events, players often have multiple shadows from multiple stadium lights. In both cases, the shadows are coming from the key lights. Your results may vary.
In the sphere scene from before, the only shadows coming from my light were from the key light:
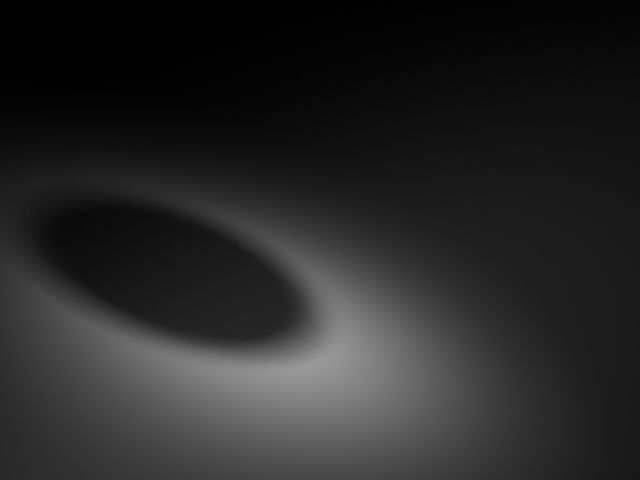
You'll notice that the ground directly below the sphere is brighter in the shadow image above than in the final image. That's due to a cool trick called Ambient Occlusion ("AO" for short). As far as render-intensive shadows go, this one takes the cake, but it makes everything look really good. It simulates a uniform light sphere around your objects and sees how much any given point is shadowed by other geometry in the scene. The end result is darkening near where objects and faces come together and soft shadows. The ambient occlusion render for the sphere scene is pretty boring, but this is actually a great way to show off your models on your demo reel!
That's great, but how do I do it?
This lab is mostly an artistic exercise on how to make your images look good. For a more technical description on how to create and place lights in your scene, please check out http://learn.ucbugg.com/lighting.
The most basic way to create a light in Maya is by navigating to Create -> Lights. Once you've created a light, you can move it around just like any other object and you can edit its properties like any other objects in the Attribute Editor. A lot of the light's attributes are self explanatory: Color sets the color of the light, Intensity sets it's general brightness. A light's decay rate governs how much the light weakens as objects get farther away from the light. High school physics says that all lights decay at a quadratic rate, but for some cases this just isn't needed (ex. the sun's light decays quadratically, but doesn't change much over the space of a few hundred meters).
You can do this lab with just spot lights, so I'll explain them here, but for a more detailed look at all the different lights, see the lighting tutorial.
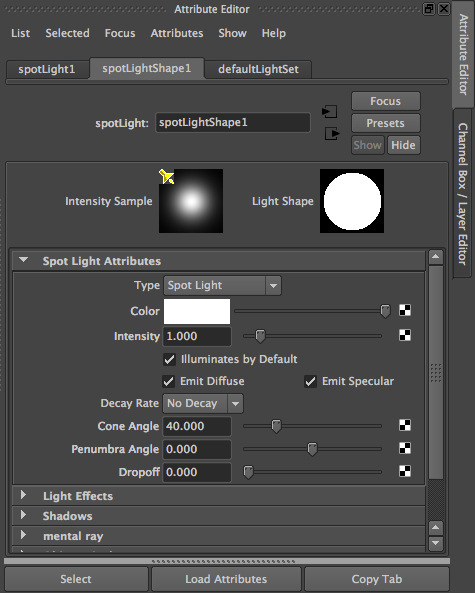
Spot Light
Maya has a bunch of lights, but the most basic (and one of the more versatile ones) is the spot light. It's main characteristic is that light shoots out of it in a cone shape. You can control the cone's angle by adjusting the Cone Angle Attribute. To get softer falloff, adjust the Penumbra Angle and Dropoff.
Turning on Shadows
Turn depth map shadows on for your spot light by selecting the light, going to the attribute editor and looking in the Shadows > Depth Map Shadow Attributes section. To turn on shadows, simply check the "Use Depth Map Shadows" check box. The main control for shadow quality is the "Resolution" slider (higher resolutions result in cleaner shadows). To blur the shadow, increase the "Filter Size".
Ray traced shadows take longer to render and are less controllable but are faster to set up and often have less artifacts. To turn these shadows on, check the box for "Use Ray Trace Shadows".
Let's light something already!
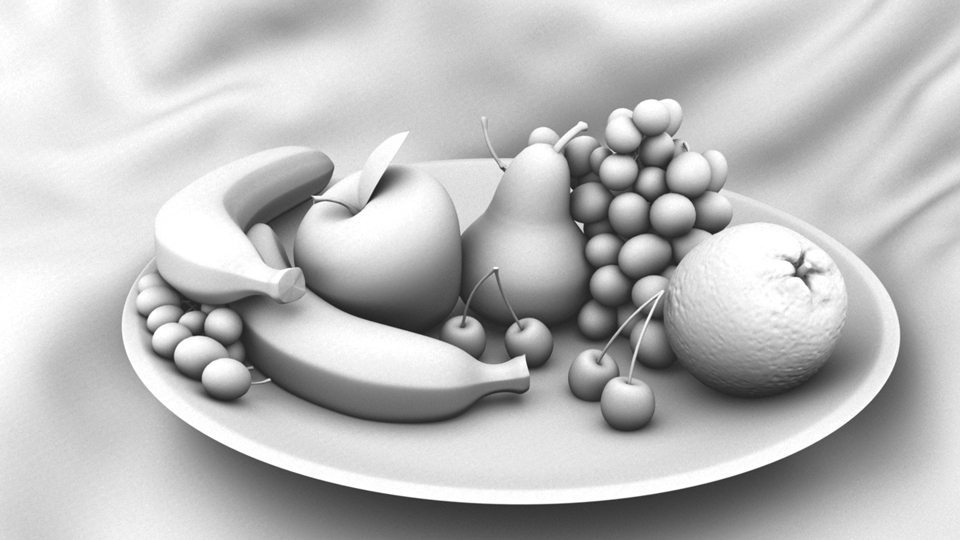
A common test of skill for lighters is their ability to light a bowl of fruit. Their organic shapes have plenty of little bumps for light to bounce off of and cast tiny reflections. Download your own bowl of fruit and try it out for yourself!
Some hints:
Setting up Ambient Occlusion
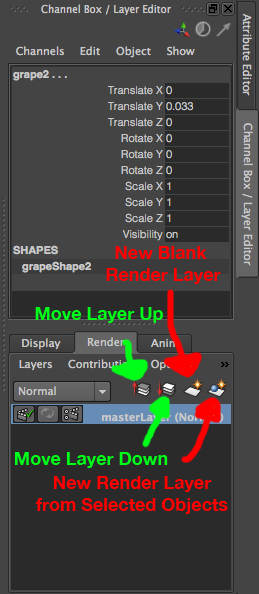
To set up an ambient occlusion pass, first make sure you have the mental ray plugin loaded. Then select all the objects in your scene and click the button for creating a new render layer with the selected objects (see below)
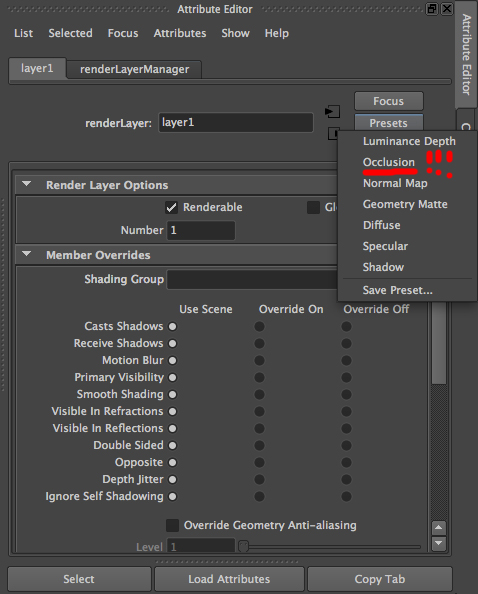
Once you've created your render layer, right click it and select "Attributes". In the attribute editor, click "Presets" and select "Occlusion" as shown below.
Useful: Rename your layer something useful, like "AO" and not "layer1". Your group will thank you.
To have it affect your other layers, move your newly created Ambient Occlusion layer to the top (by hitting the Move Layer Up button in the channel box editor's Render layers section) and set the blending type to multiply. Then make sure "Render All Layers" is checked and use the option box to make sure is set to "Composite" or "Composite and Keep Layers"
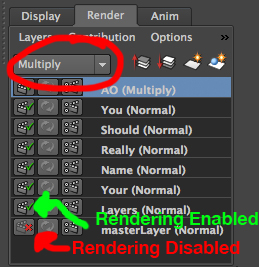
Also Useful: Since rendering Ambient Occlusion can take a long time, you can disable it while working on your other lights. Toggle the rendering enabled button the AO layer to turn it on and off.
What to Aim For
I lit this scene with four spot lights and ambient occlusion. I used a basic three point lighting setup and one additional light to brighten up the shadowed areas. See what you can do!
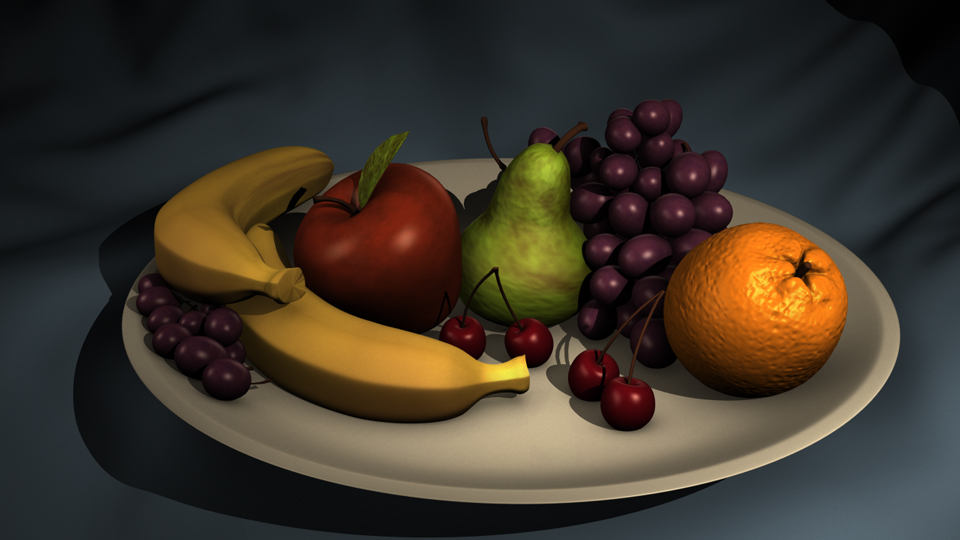
This model was taken from a lighting challenge from Jeremy Birn. Check out the other submissions to this lighting challenge at http://www.3drender.com/challenges/fruitbowl/index.htm